Use Hexo + ICarus to build a website

Introduction
Recently, I realize that there are many benefits to write technical blog on a personal websites. It allows us to summarize the techniques we’ve learned, helping review what we did before, and to learn with each other.
Hence, this blog is to show how to build a personal site using static website generator, such as Hugo, Hexo and Jekyll. Static site generate actually generates the general html, css and javascript,etc files we need in the framework of website.
Comparison among Hugo, Hexo, Jekyll
Hugo:
Language
- GoLang
Advantage
- The fastest framework for constructing website
- Good flexibility and no need to install many packages since Using Go language
- many built-in functions/plugins
- Templates for GoLang
- International Use
- Support Markdown
Disadvantage
- Need to be familiar with GoLang
- Without default themes for website
- Lack of extensive plugins
Hexo:
- Language
- Node.js
- Advantage
- Fast generating speed
- Support markdown
- Easy to setup Github page
- Good Chinese support (Most of users are Chinese)
- Many different themes for website
- Stable
- Disadvantage
- May be lack of supports for other languages, since most of users are Chinese
- Need to install some packages for plugins
- Language
- Ruby
- Advantage
- Simple to use
- Many free themes and plugins
- Easy to publish to Github
- Disadvantage
- Not international (may be blocked in some countries)
- Some plugins are not supported by Github Page
- Speed of constructing website could be slow as more documents/passages are included in website.
Setup Hexo
I choose Hexo as the first generator for my website since it provides many different themes and plugins. To setup Hexo and publish your website, we first need to setup our work environment (Node.js) for Hexo and associate our website to our server (Github page).
Setup Node.js and Git environment
Install Node.js . Here is Chinese Reference
Install Git to manage your repository of your website and open Git bash terminal.
Open the git bash terminal and Install Hexo using command:
1
$ npm install hexo-cli -g
Initialize the folder that stores your website after install hexo:
1
$ hexo init new-folder-name
Then hexo will create the folder with the name “new-folder-name” and setup the environment. Inside the folder
1
2
3
4
5
6
7
├── _config.yml
├── package.json
├── scaffolds
├── source
| ├── _drafts
| └── _posts
└── themes_config.yml contains the common configurations for the website. source contains the passages you are writing. themes is the folder containing all different themes for your website.
Associate our website to server (I choose Gitpage here)
Select your server
There are many different servers for your website. To read more about choosing server for your websites, click here
Since GithubPage provides a free way to publish our website and Github is a very powerful open source repository website. I use GithubPage for me website in this passage.create Github account
create a new repository with name: <Your github name>.
github.io
Install git plugin for Hexo
1
$ npm install hexo-deployer-git --save
create SSH key
1
$ ssh-keygen -t rsa -C "your email address"
Copy your generated SSH key in the _id_rsa.pub file_ in the path you set like (C:\Users\Administrator.ssh\id_rsa.pub) to your New ssh key
Modify the deployment setting in _config.yml file in the root directory of your website.
1
2
3
4
5
6
# Deployment
## Docs: https://hexo.io/docs/deployment.html
deploy:
type: git
repo: git@github.com:<Github账号名称>/<Github账号名称>.github.io.git
branch: master
Upload your website to github
Note: the default theme of your website in Hexo is landscape. so you don’t need to add any file to your website during testing. To learn more about how to write and post your passage, click here
Choosing theme for your blog
If you dislike the default theme (landscape) in hexo, you can install other themes and change the _config.yml file setting to update your website.
For example, if you want to install icarus theme,
Go back to the root of your website, install icarus them using this command
1
$ git clone https://github.com/ppoffice/hexo-theme-icarus.git themes/icarus
Modify your config.yml file
1
2
3
4
5
# Extensions
## Plugins: https://hexo.io/plugins/
## Themes: https://hexo.io/themes/
#theme: landscape
theme: icarusI annotate the theme of landscape and choose icarus here. Note: do not add any space before the keyword “theme”, otherwise, the theme will not update
Generate static site files and update them to github
generate static site files
1
$ hexo g
upload the files to github directory <your github name>.github.io
1
$ hexo d
Then you can type <your github name>.github.io in your browser to visit your website.
Setup Comment plugin
In hexo, there are many different plugins for comment function, like valine, gitalk, gitment. Take valine as example here.
Create an account on Leancloud
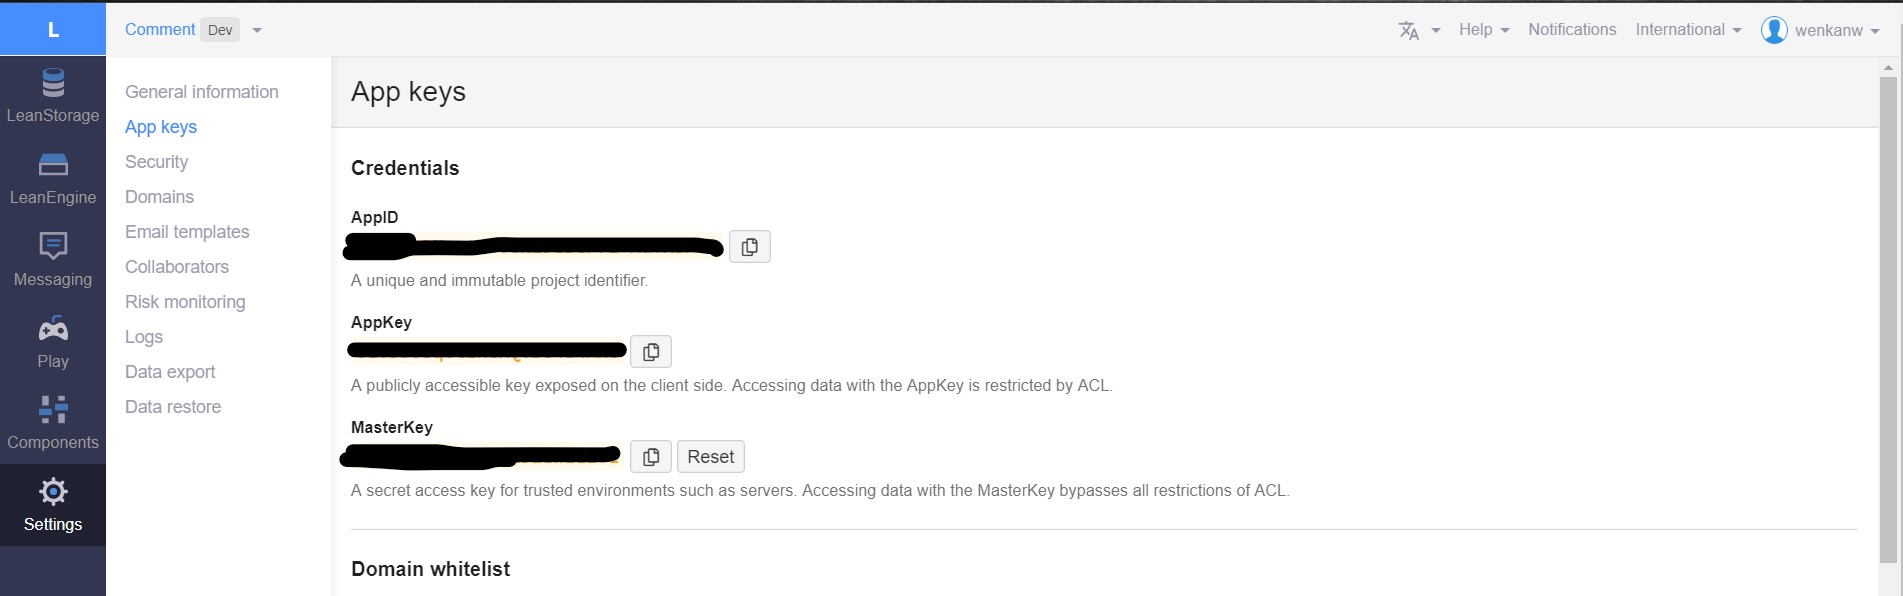
Create a new App, then click the app you created -> Settings->App keys
Copy AppID and AppKey

Modify the comment setting in _<your hexo’s root>/theme/<directory name of icarus>/config.yml
1
2
3
4
5
6
7
8
9
10
# Comment plugin configurations
# https://ppoffice.github.io/hexo-theme-icarus/categories/Plugins/Comment/
comment:
# type: disqus
# # Disqus shortname
# shortname: 'Disqus'
# Name of the comment plugin
type: valine
app_id: 'AppID'
app_key: 'AppKey'
Generate static site files and deploy them again
1
$ hexo g -d
Additional Notes
Useful commands in Hexo
1
2
3
4
5
6
7
8
9
10
11
12
13
14
15
16
17
18
19
20
21
22
23
24
#in the root directory of hexo
$ hexo new page <page-name> #default generate a directory in source/
$ hexo new <file-name without postfix ".md"> #generate <file-name>.md file in /source/__post
$ hexo clean #clean all static site files
$ hexo g #generate static site files
# or
$ hexo generate
$ hexo d #deploy website, push it to the server
#or
$ hexo deploy
$ hexo g -d # generate and deploy website
#move file from __drafts to __posts and publish the passage to website
$ hexo publish draft <filename without postfix ".md">
# Start local server and display your websiteat http://localhost:4000
$ hexo s
# or
$ hexo serverTo enable catalogue in icarus
- to enable the passage to show up in catergory, tags, at the top of markdown file add
-–
type: [“category”, “tags”]
-– - To let catalogue show up in the page, add toc: true to the top of the file:
-–
toc: true
type: [“category”, “tags”]
-–
- to enable the passage to show up in catergory, tags, at the top of markdown file add
To change th background of your blog
go to themes\next\source\images folder to put your background image
Then go to the file themes\next\source\css_custom\custom.styl to add
the following codes, where bg.jpg is your background image.1
2
3
4
5
6
7body{
background:url(/images/bg.jpg);
background-size:cover;
background-repeat:no-repeat;
background-attachment:fixed;
background-position:center;
}Then rebuild your HTML blog by commands
1
hexo clean && hexo g -d
To change the text of button “next” and “previous” of page to be “next >” and “< prev”:
In file: themes\next\layout_partials\pagination.swig , Change1
2
3
4
5
6
7
8
9<nav class="pagination">
{{
paginator({
prev_text: '<i class="fa fa-angle-left"></i>',
next_text: '<i class="fa fa-angle-right"></i>',
mid_size: 1
})
}}
</nav>to
1
2
3
4
5
6
7
8
9<nav class="pagination">
{{
paginator({
prev_text: '< prev',
next_text: 'next >',
mid_size: 1
})
}}
</nav>This enable you to change the text of next, prev button
References
- https://blog.zhangruipeng.me/hexo-theme-icarus/Widgets/icarus%E7%94%A8%E6%88%B7%E6%8C%87%E5%8D%97-%E6%8C%82%E4%BB%B6/
- https://lexcao.github.io/zh/posts/jekyll-hugo-hexo
- https://juejin.im/post/5bebfe51e51d45332a456de0#heading-9
- https://www.vincentqin.tech/posts/build-a-website-using-hexo/
- https://zsh2401.top/post/configure-theme-icarus/